

It is strongly recommended that you peruse the Handhelds.org FAQ/Howto, particularly the section on Getting Started.
Installation of Linux on the iPAQ has the following requirements:
You will need a Compaq iPAQ PDA:
The H3100 requires a different set of boot images. Please be careful to fetch the correct boot images, otherwise your kernel will generate an oops and will halt.
These are supported.
This is also supported.
See H3800 Linux port status page for details.
Unsupported at this time
See H3900 Linux port status page for details.
The only way to communicate with the bootldr is via the serial port. You will need a serial sync cable or serial sync cradle. You will need to use a terminal program such as minicom, kermit, or Hyperterminal.
If you use minicom or kermit, you will need to use an external xmodem program such as sx, which is available in the Linux lrzsz package.
The bootldr does not use the USB interface and you cannot access it with a USB cable or cradle. The dual USB/Serial cradle that comes with the H3800 will work.
Linux requires its own boot loader. Once you have installed this boot loader, it will also boot wince, so you need never go back. If you are already running a modern bootloader, you are all set. Any bootloader newer than 2.18.01 will work. We recommend that you run 2.18.54.
If you do not have the CRL boot loader installed, go install it now. Please be sure to follow every step of those instructions before continuing.
You will need to complete the installation and install optional packages over the Internet. You will need to configure your iPAQ to use Ethernet (easiest), WLAN, PPP (via direct-connect serial cable or modem), or USB (requires a driver on your host computer).
You will need a recent bootloader and one of the following filesets. Please check the md5 sum. If you already have 2.18.01 flashed into the boot sector of your iPAQ's flash, you do not need to upgrade to 2.18.54. We recommend that you upgrade, but it is not a requirement. If you already have 2.18.54 install, you do not need to reflash it. If you have a newer version in your flash, you do not need to downgrade to 2.18.54.
| Familiar v0.6 Installation Components | ||||||||||||||||||||||||||
|
Make sure the terminal emulator is up and running, and is properly interacting with the bootloader. Proper interaction consists of being able to issue commands, and get responses (e.g. the help command should return the bootloader usage). Your terminal emulator must be set to 115200 8N1 serial configuration, no flow control, no hardware handshaking. Failing to use these settings will lead to trouble, so double and triple check all settings.
If you cannot interact with the bootloader, make sure your terminal settings are correct, that the iPAQ is properly connected to the host computer, and that the iPAQ is actually on. If everything seems fine, try restarting the host terminal emulator, and toggle a hard-reset on the iPAQ (i.e. by switching the battery disconnect at the bottom off, waiting 10 seconds, and then back on again).
Hyperterminal is particularly ill-behaved. Sometimes it uses 100% of the CPU without allowing any interaction with the iPAQ. In that case, you will need to use the task manager to terminate Hyperterminal before you can restart it.
Go back and install the bootldr if you are not currently running a CRL bootldr.
You can tell if you have bootldr 2.18.54 by looking at the version number on the display or by using the ver command at the "boot>" prompt:
boot> ver Compaq OHH BootLoader, Rev 2.18.54 [BIG_KERNEL] [MD5] [MONO] Last link date: Thu Oct 17 16:29 EDT 2002 boot> |
Some of the functionality of Familiar v0.6 (e.g. booting the kernel out of the root filesystem, not requiring a parameter partition) requires that you have a recent bootloader revision. You must have at least 2.18.01. The recommended bootloader for the iPAQ is OHH/CRL bootldr 2.18.54 or a later revision (see the above software table for locations).
If you already have bootldr 2.18.01 or later installed, you can skip this step. Before you start, be sure your iPAQ is well charged, and plugged into a constant power source. DO NOT, under any circumstances, reset the iPAQ during this process. There is a chance you could get your device into an unusable state. Although CRL has graciously offered to repair "bricked" iPAQs, doing so is inconvenient for everyone involved.
Otherwise, upgrading is quite straight forward:
Here's an example:
boot> load bootldr loading flash region bootldr using xmodem ready for xmodem download.. BSD sum value is: 00000000 programming flash... unlocking boot sector of flash Protect=00000000 erasing ... Erasing sector 00000000 writing flash.. addr: 00000000 data: EA00008E addr: 00010000 data: E1A0C00D verifying ... done. startAddress :00000000 limitAddress :00018980 Protecting sector 00000000 Protect=00010001 |
Note: Don't panic if your numbers are different. The most important parts of the above example are the "erasing .. writing flash .. verifying .. done" steps.
At this point, using your stylus, hit the reset button at the bottom right hand corner of the iPAQ. You should now see the new bootloader splash screen. Hit your space-bar, in your terminal emulator, to get back to the "boot>" prompt, or press the Calendar key.
One more time, make sure that both hardware and software flow control are disabled on the serial port. If the iPAQ is not accepting input from the serial port, most likely hardware flow control was enabled in the terminal emulator.
In order to properly boot the Linux, with the correct kernel arguments, the flash partitions need to be setup correctly. You only need to do this step if you have upgraded to 2.18.54. If you have freshly installed your first CRL bootloader ever, you can skip this step (but performing it will harm nothing).
The boot-loader should inform you that it has reset, and redefined the flash partitions. If you had any problems w/ the above step, make sure that you reset your iPAQ after upgrading to bootldr 2.18.54.
Here's an example:
boot> partition reset argv[1]=reset defining partiton: bootldr defining partiton: root boot> |
As an initial step, a root filesystem image must be installed using the
iPAQ's boot-loader.
If you have a CF flash card or CF or PCMCIA hard drive, you can use the much faster alternative flashing procedure.
You should see something like:
boot> load root loading flash region root using xmodem ready for xmodem download.. Erasing sector 00140000 Erasing sector 00180000 Erasing sector 001C0000 Erasing sector 00200000 . . . addr: 00360000 data: 781590DB addr: 00370000 data: 642637AE addr: 00380000 data: E0021985 addr: 00390000 data: 15DA97EC Erasing sector 00FC0000 writing flash.. addr: 00100000 data: E0021985 addr: 00110000 data: E3BAD617 addr: 00120000 data: 0FA1F57B addr: 00130000 data: 9343AEEB . . . addr: 00600000 data: E0021985 addr: 00610000 data: FFFFFFFF addr: 00620000 data: FFFFFFFF addr: 00630000 data: FFFFFFFF verifying ... formatting ... done. boot> |
Again, the important part of this process is that the bootloader successfully erased, wrote, and verified the filesystem image.
You will need at least bootldr 2.18.54 to do this.
If you have a Compact Flash sleeve and Compact Flash card, you can put the filesystem image onto the CF card. This procedure is much faster than transferring the root image via xmodem or ymodem over the serial cable. The CF card must have a vfat filesystem (most do). At the "boot>" prompt, type: copy hda1:/filename root .
You should see Linux startup, and numerous daemons execute. It will pause for 10 or 20 seconds while it generates an ssh server key for your iPAQ.
... Generating SSH DSA host key (this is slow, please be patient)... Generating DSA parameter and key. Your identification has been saved in /etc/ssh/ssh_host_dsa_key. Your public key has been saved in /etc/ssh/ssh_host_dsa_key.pub. The key fingerprint is: 75:60:e4:ab:75:4a:5c:17:e5:10:fd:4e:81:e4:84:ca root@familiar Done. Starting OpenBSD Secure Shell server: sshd. familiar login: |
If all goes well, you should be presented with a "login:" prompt, as shown above.
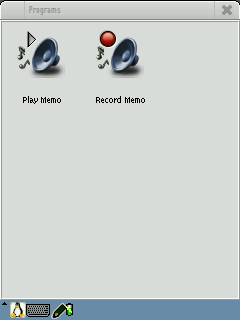
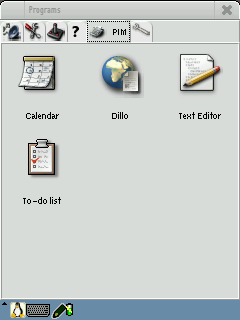
Here is a screen shot of the iPAQ's display if you installed the bootgpe image.

|

|

|

|
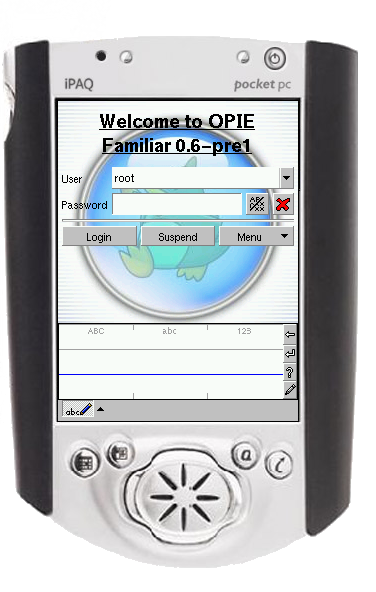
Here is a screen shot of the iPAQ's display if you installed the bootopie image.

|

|
Here is a screen shot of the iPAQ's display if you installed the bootstrap image.

The next step is to configure the iPAQ for access to the Internet. If you're using DHCP and a PCMCIA/CF networking card, everything might work out of the box. If not, consult one of the following URLs:
Verify that everything is operational (e.g. by ping'ing familiar.handhelds.org). Be sure that there is at least one nameserver entry in /etc/resolv.conf (if you are using pump for DHCP, this will be taken care of for you).
At this point, it's useful to set the time on the iPAQ. The
easiest mechanism for doing this is using "ntpdate" to retrieve time
information from over the network. An example would be to enter
ntpdate -b time.handhelds.org on the command line.
In order to proceed using Familiar's packaging tools, the available package list must be updated. Execute the following at a shell prompt: ipkg update.
At this point you have a booting iPAQ. In order to make it useful as more than just a kernel and a running shell, it helps to install new packages. The easiest way to do this being ipkg.
In order to see a listing of available packages, simply execute: "ipkg list". The Familiar Project provides several meta-packages, in order to make it easiers for users to get a useful environment:
| Meta Package Name | Description |
| complete | A "complete" set of packages installed. Creates a usable
X environment to work in. Please see the postinst FAQ below if you're going to be installing this meta-package. |
| x | All the required bits to get a working X server, and clients up. |
| wireless | The utilities for configuring 802.11b cards. |
| mp3-player | Sound configuration and MP3 playback utilities. |
In order to install any of the above meta packages, simply execute " ipkg install meta_package_name". ipkg will download and install all the proper packages to meet the required dependencies. For example, to install complete, which includes x, wireless and mp3-player, perform the following commands:
# ipkg update
Downloading http://familiar.handhelds.org/familiar/releases/v0.6/packages/armv
4l/Packages
--12:36:54--  http://familiar.handhelds.org:80/familiar/releases/v0.6/packages
/armv4l/Packages
           => `/tmp/ipkg-6HmCQP/Packages'
Connecting to familiar.handhelds.org:80... connected!
HTTP request sent, awaiting response... 200 OK
Length: 190,600 [text/plain]

    0K -> .......... .......... .......... .......... .......... [ 26%]
   50K -> .......... .......... .......... .......... .......... [ 53%]
  100K -> .......... .......... .......... .......... .......... [ 80%]
  150K -> .......... .......... .......... ......                [100%]

12:36:55 (533.33 KB/s) - `/tmp/ipkg-6HmCQP/Packages' saved [190600/190600]

Updated list of available packages in /usr/lib/ipkg/lists/v0.6
# ipkg install complete
Downloading http://familiar.handhelds.org/familiar/releases/v0.6/packages/armv
4l/apmd_3.0final-1-fam2_arm.ipk
--12:37:13--  http://familiar.handhelds.org:80/familiar/releases/v0.6/packages
/armv4l/apmd_3.0final-1-fam2_arm.ipk
           => `/tmp/ipkg-ykp9Ru/apmd_3.0final-1-fam2_arm.ipk'
Connecting to familiar.handhelds.org:80... connected!
HTTP request sent, awaiting response... 200 OK
Length: 7,085 [text/plain]

    0K -> ......                                                 [100%]
...

Installing complete (0.11)
Configuring complete...Done
|
The "familiar-postinst" package provides a mechanism for performing a couple common operations that people are interested in:
Simply run /root/postinst. It will take care of the rest. You can see all the output if you run /root/postinst-x.
# /root/postinst
--12:45:13--  http://familiar.handhelds.org:80/familiar/releases/v0.6/install/H3
600/postinst-kit.tar.gz
           => `postinst-kit.tar.gz'
Connecting to familiar.handhelds.org:80... connected!
HTTP request sent, awaiting response... 200 OK
Length: 14,143 [application/x-tar]

    0K -> .......... ...                                         [100%]

12:45:13 (460.38 KB/s) - `postinst-kit.tar.gz' saved [14143/14143]

 1 Jun 12:45:15 ntpdate[928]: Can't adjust the time of day: Invalid argument

These fonts are provided by Microsoft "in the interest of cross-
platform compatibility".  You are free to download these fonts and
use them for your own use, but you may not redistribute these fonts
without first registering with Microsoft and following their restrictions.

--12:45:15--  http://www.microsoft.com:80/typography/downloads/andale32.exe
           => `andale32.exe'
Connecting to www.microsoft.com:80... connected!
HTTP request sent, awaiting response... 200 OK
Length: 198,384 [application/octet-stream]

    0K -> .......... .......... .......... .......... .......... [ 25%]
   50K -> .......... .......... .......... .......... .......... [ 51%]
  100K -> .......... .......... .......... .......... .......... [ 77%]
  150K -> .......... .......... .......... .......... ...        [100%]

12:45:17 (121.24 KB/s) - `andale32.exe' saved [198384/198384]

--12:45:17--  http://www.microsoft.com:80/typography/downloads/verdan32.exe
           => `verdan32.exe'
Connecting to www.microsoft.com:80... connected!
HTTP request sent, awaiting response... 200 OK
Length: 351,992 [application/x-msdownload]

    0K -> .......... .......... .......... .......... .......... [ 14%]
   50K -> .......... .......... .......... .......... .......... [ 29%]
  100K -> .......... .......... .......... .......... .......... [ 43%]
  150K -> .......... .......... .......... .......... .......... [ 58%]
  200K -> .......... .......... .......... .......... .......... [ 72%]
  250K -> .......... .......... .......... .......... .......... [ 87%]
  300K -> .......... .......... .......... .......... ...        [100%]

12:45:21 (101.85 KB/s) - `verdan32.exe' saved [351992/351992]

extracting 'fontinst.inf'...
extracting 'andale.inf'...
extracting 'fontinst.exe'...
extracting 'AndaleMo.TTF'...
extracting 'ADVPACK.DLL'...
extracting 'W95INF32.DLL'...
extracting 'W95INF16.DLL'...
extracting 'fontinst.exe'...
extracting 'fontinst.inf'...
extracting 'Verdanab.TTF'...
extracting 'Verdanai.TTF'...
extracting 'Verdanaz.TTF'...
extracting 'Verdana.TTF'...
All fonts downloaded and installed.  Thank you, Bill.

Familiar post-installation completed successfully.
#
|
See the GPE Newbie page.
Most likely, the terminal emulator has hardware flow control enabled. Disable both hardware and software flow control. If you are using Hyperterminal, sometimes it consumes all CPU cycles and needs to be restarted.
The problem is that Linux doesn't know what timezone you are in, and so it is defaulting to GMT. To correct this, install an appropriate timezone file on the iPAQ at /etc/localtime. You should be able to find a link to such an appropriate timezone file at /etc/localtime on your desktop Linux system. After you have installed /etc/localtime, to get existing time displays to update (like the blackbox time), you may need to stop and start the appropriate process. You may find that /etc/init.d/x stop then /etc/init.d/x start done via a serial console or over a ssh session on the iPAQ, will provide the desired results.
Familiar is getting to the point where it is quite dependent on access to the Internet. Task-complete was put together so that people did not need a full net connection to their iPAQ to check out the full feature-set of Familiar,.. with some of the new changes/dependencies (e.g. TrueType fonts), this really isn't possible.
Please follow the provided instructions on configuring net connectivity for the iPAQ.